A roof curb and its flashing solve different problems. The curb provides the specified mounting interface between an exhaust fan and the building; the flashing connects that penetration to the roof’s weatherproofing system. A fan that fits on top is not, by itself, evidence that the support or waterproofing detail is correct.
Before ordering a curb or opening the roof, coordinate the exact fan, curb, structural and roofing documents. This checklist explains what needs to agree. It is not a universal curb-height, anchoring or flashing specification: those details belong to the approved project design and the relevant manufacturers’ instructions.
Separate the fan interface from the roof detail
Start by identifying who owns each part of the installation. Structural review establishes the opening, framing, support and anchorage. The fan and curb manufacturer provide the mating dimensions, orientation, load information and service clearances. The roofing-system manufacturer or qualified roofing designer defines how the actual roof assembly meets the penetration.
These responsibilities overlap at the curb. A dimension accepted by the fan supplier still needs to work with the support arrangement and finished roof build-up. Resolve that junction on the coordinated drawing, rather than leaving the installer to reconcile several unrelated sketches on the roof.
| Interface | Information to reconcile |
|---|---|
| Fan to curb | Mating dimensions, orientation, gasket, fasteners and access |
| Curb to structure | Opening, framing, load path, support and anchorage |
| Curb to roof assembly | Flashing materials, transitions, laps, terminations and drainage |
| Installation to operation | Services, inspection access and the approved commissioning method |
Check the complete assembly, not just the nominal fan size
Compare the exact fan-base drawing with the curb submittal. Confirm which dimension refers to the opening and which refers to the mating surface. Include the damper and any other specified components in that review. Similar-looking products are not interchangeable mounting details.
Keep access in the same drawing set. The space required to inspect the fan, reach its services and complete the prescribed maintenance should remain available after the roofing and adjacent equipment are in place. Resolve electrical routing without obstructing access or compromising the roof detail.
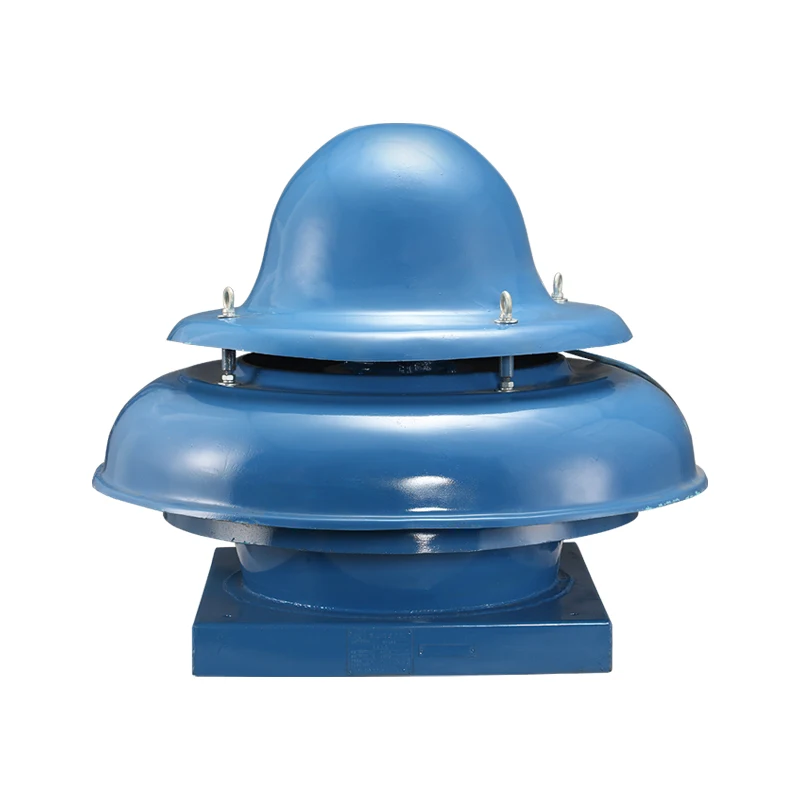
Roof-exhaust-fan exterior example. The photograph does not show a roof curb, structural anchorage or flashing assembly; obtain the drawings for the exact equipment being installed.
The Longwell roof exhaust fan range is a starting point for identifying the equipment family. Use the selected model’s submittal, not the appearance of a catalog photograph, to confirm its interface.
Resolve curb height, roof build-up and drainage together
A single curb-height recommendation cannot account for every roof. Review the finished assembly, including the specified insulation, flashing arrangement and drainage conditions. Roof geometry, snow or flood exposure and project requirements can affect the final detail. The height and arrangement should come from that review, not from a dimension copied from another installation.
Look at where water is intended to travel around the penetration. Do not conceal ponding or a blocked drainage route beneath a finished-looking installation. Insulation, thermal breaks and condensation also need explicit attention; they should not become unanswered questions after the fan has been lifted into position.
Treat flashing as a roofing-system connection
Specify flashing for the roof system actually present. Membrane transitions, compatible materials, laps and terminations need to follow the approved roofing detail and its warranty requirements. A generic sketch cannot establish compatibility with a different roof assembly.
Sealant is not a substitute for a designed flashing assembly. If the drawings do not explain how the roof remains continuous around the curb, resolve the detail with the roofing specialist. Adding an unspecified bead around an unresolved junction does not answer the design question.
Keep the roof-system check distinct from the fan-to-curb gasket check. Both appear in the final inspection, but accepting one does not establish that the other is complete.
Confirm the support and lifting plan before roof work
Wind and seismic requirements, equipment loads and the building structure influence support and anchorage. Have the responsible designer confirm the load path and approved fixing arrangement. Do not transfer anchor choices or field-cutting details from an unrelated job.
The work plan also needs controlled roof access, fall protection, weather conditions, lifting arrangements and protection of the opening. Use the approved lifting points and rigging plan. A convenient-looking fan component is not a verified lifting point. Set the assembly square, level and in its specified orientation under the manufacturer’s instructions and coordinated project detail.
Inspect the roof and the operating fan as separate checks
Before handover, verify the support and anchorage, the fan-to-curb fit, the specified gasket and fasteners, and the continuity of the roof membrane. Check drainage and service routing while the relevant interfaces remain accessible. Record the inspection against the accepted drawings, including any resolved changes.
Commissioning then checks rotation, airflow, vibration and sound under the approved method. Weather-tightness verification is a separate part of the acceptance plan. A running fan does not demonstrate that the roof connection is weather-tight, just as a satisfactory roof inspection does not confirm the required ventilation duty.
For broader equipment context, see the roof fan application overview. The installation still needs the project’s own operating requirements and acceptance criteria.
Prepare a coordinated enquiry, not an isolated curb dimension
A useful enquiry brings together the fan model and base drawing, required duty, curb and damper information, roof build-up and geometry, support detail, site exposure, drainage and access constraints. Identify which drawings are approved and which interfaces remain unresolved. That gives the equipment supplier, structural designer and roofing specialist a common set of questions to answer before procurement and installation.